Webflow is a powerful platform that lets you design, build, and launch responsive websites without coding. But did you know that you can also use Webflow to create amazing blogs? Whether you want to share your thoughts, showcase your work, or grow your audience, Webflow can help you achieve your blogging goals. In this article, we will show you how to create the perfect blog on Webflow in four easy steps.
Why You Should Choose Webflow For Your Blog
Webflow is a great choice for creating a blog without coding. Here are some of the reasons why you should choose Webflow for your blog:
- Webflow offers a variety of blog templates that you can customize to suit your style and brand. You can also create your own blog design from scratch using Webflow’s visual editor.
- Webflow has a built-in CMS that lets you store, organize, and edit your blog content easily. You can also edit your content directly on the page, without switching to a different interface.
- Webflow is SEO-friendly and helps you optimize your blog for search engines and social media. You can also use Webflow’s integrations to connect your blog with email marketing, social media marketing, or content marketing tools.
- Webflow provides fast and secure hosting for your blog, with features such as SSL, CDN, backups, and custom domains. You can also use Webflow’s e-commerce features to sell products or services related to your blog.
Webflow gives you everything you need to create the perfect blog on Webflow.
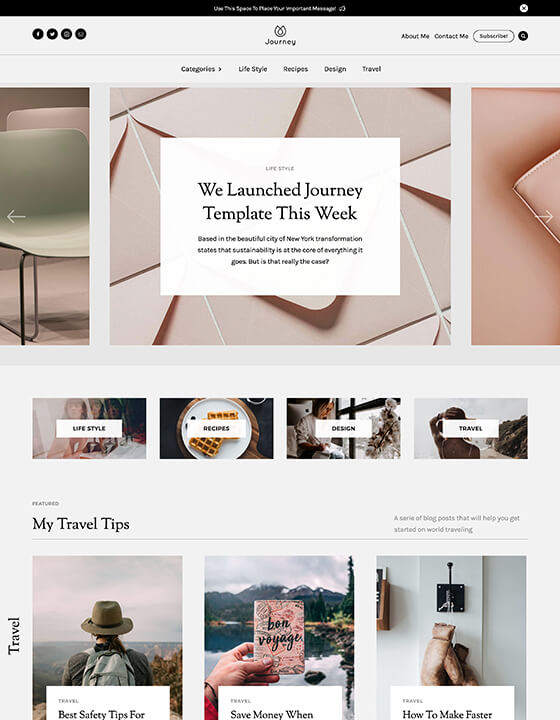
Step 1: Choose a Webflow Blog Template
The first step to create a blog on Webflow is to choose a template. Webflow offers a variety of blog templates that you can use as a starting point for your blog. You can browse and preview the templates on Webflow’s template marketplace and filter them by category, price, or popularity. Some of the templates are free, while others are paid. You can also see the ratings and reviews of each template to help you make your decision.
Once you find a template that you like, you can click on “Get this template” and create a Webflow account or log in to your existing one. You can then clone the template to your dashboard and start customizing it. You can change the colors, fonts, images, layout, and content of the template to suit your style and brand. You can also add or remove elements, pages, or features as you wish. Webflow gives you full control over the design and functionality of your blog.
Step 2: Set Up Your Webflow CMS
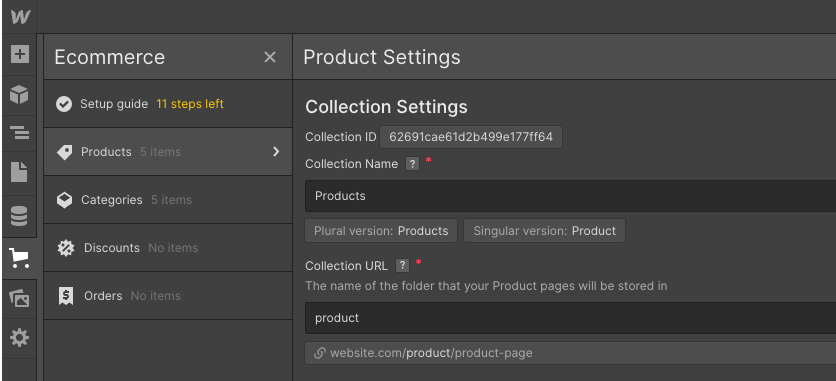
The second step to create a blog on Webflow is to set up your CMS. CMS stands for content management system, and it allows you to store, organize, and edit your blog content. Webflow has a built-in CMS that is easy to use and customize. You can access the CMS from the Designer or the Editor.
The CMS consists of Collections, which are content types that you can create and manage. For example, a blog post is a Collection, and each blog post is an item in that Collection. Webflow provides a default blog post Collection for you, but you can also create your own Collections for other content types, such as authors, categories, tags, or testimonials.
To set up your CMS, you need to define the fields for each Collection. Fields are the pieces of information that you want to display or use for each item. For example, a blog post field can be the title, the author, the date, the image, the summary, or the content. You can choose from different field types, such as text, rich text, image, link, number, date, or reference. You can also make some fields required, unique, or searchable.
Step 3: Add and Edit Your Blog Content
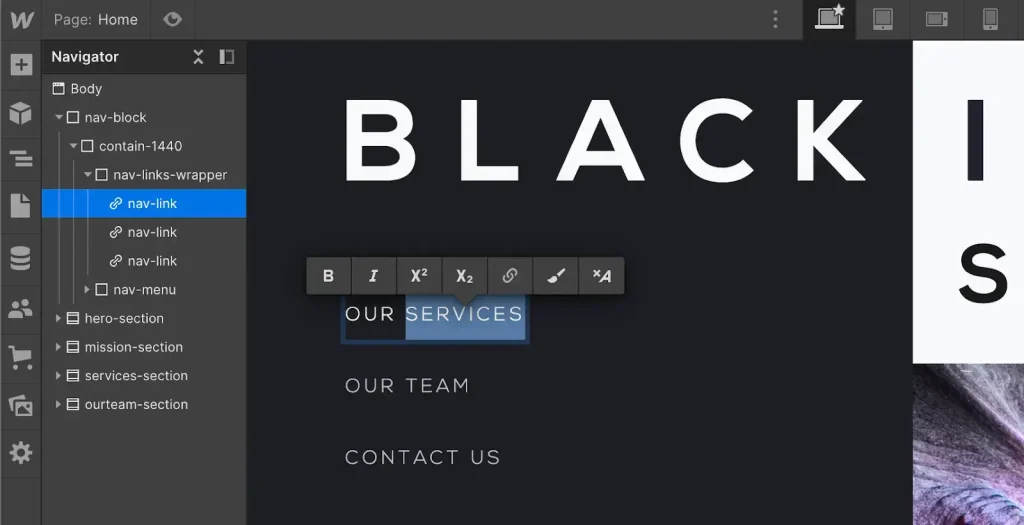
The third step to create a blog on Webflow is to add and edit your blog content. You can do this from the Designer or the Editor, depending on your preference and role. The Designer is where you can design and build your blog, while the Editor is where you can edit and publish your blog content.
To add a new item to a Collection, you can click on the plus icon on the top right corner of the Collection panel. You can then fill in the fields that you have defined for that Collection. You can also upload images, add links, format text, or embed media. To edit an existing item, you can click on the pencil icon on the bottom right corner of the item card. You can then make changes to the fields as you wish.
One of the best features of Webflow’s CMS is the on-page editing. This means that you can edit your content directly on the page, without switching to a different interface. You can simply double-click on any element that is connected to a field, and edit it right there. This makes the editing process faster and more intuitive.
Step 4: Publish and Promote Your Blog
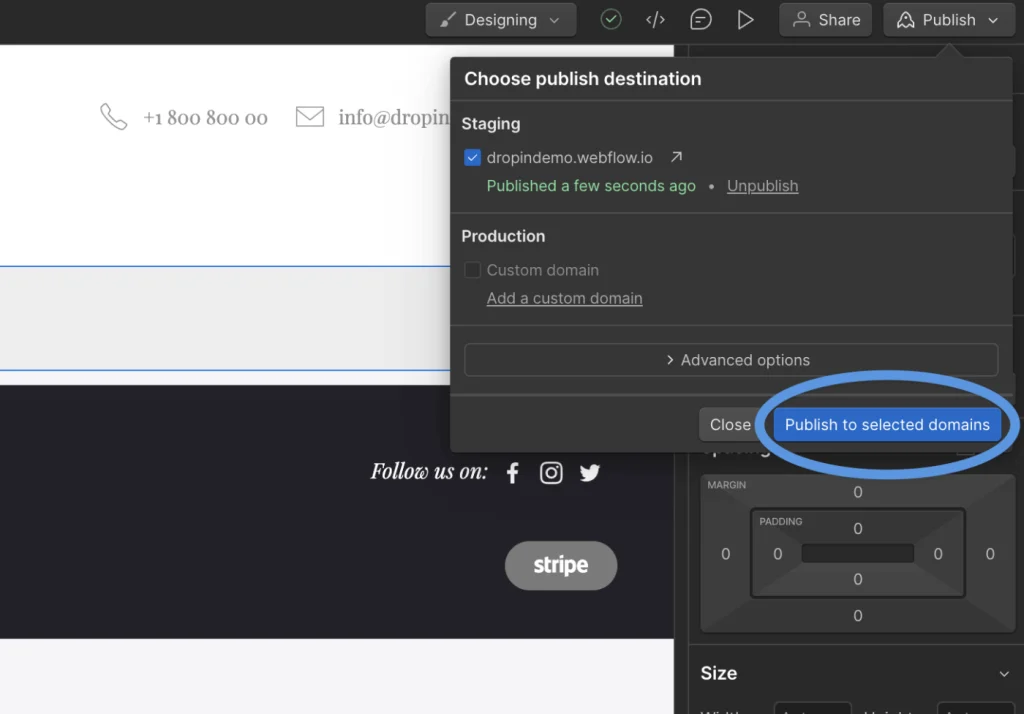
The fourth and final step to create a blog on Webflow is to publish and promote your blog. To publish your blog, you need to have a Webflow hosting plan. You can choose from different plans based on your needs and budget. Webflow hosting plans include features such as SSL, CDN, backups, custom domains, and more. You can also use Webflow’s SEO tools to optimize your blog for search engines and social media.
To promote your blog, you need to have a marketing strategy. You can use various channels and methods to reach and engage your target audience. Some of the ways to promote your blog are:
- Email marketing. You can use Webflow’s native forms or integrate with third-party tools like Mailchimp or ConvertKit to collect email subscribers and send them newsletters or updates.
- Social media marketing. You can use Webflow’s Open Graph settings or integrate with third-party tools like Buffer or Hootsuite to share your blog posts on social media platforms like Facebook, Twitter, Instagram, or LinkedIn.
- Content marketing. You can use Webflow’s rich text editor or integrate with third-party tools like Medium or WordPress to create and distribute valuable and relevant content that attracts and retains your audience.
Conclusion
Want to start a blog without coding? Use Webflow and follow this guide. You’ll learn how to choose a template, set up your CMS, and more. But if you need more help with your web projects, you can always rely on ONextDigital, a web development service that also offers white label software services. ONextDigital can handle any web challenge you throw at them, from design to development to optimization. Contact us today.


